How to Lower CPU Power Consumption
Introduction
Sometimes kernel modifications are needed to lower the power consumption of the hardware for specific applications, especially when in battery-powered devices. The goal of this article is to show different strategies to lower power consumption of Toradex modules.
Please, be aware that following this guide will reduce the power consumption of your device, but it will reduce the hardware performance as well.
Stress the CPU with stress-ng tool
This article used the stress-ng software to simulate heavy loads to the CPU.
To install it, follow the guide Build a Reference Image with Yocto Project/OpenEmbedded to get everything working for Yocto.
Once everything is done and the conf/local.conf file is with the right MACHINE for your hardware, add the following line to your conf/local.conf file:
IMAGE_INSTALL_append = " stress-ng"
Then, you can run bitbake to create your image. The stress-ng package will be installed inside of it.
To stress the CPU, run:
# stress-ng -c <CORES>
Where <CORES> is the number of cores that will be stressed.
With this command, you can measure the baseline power consumption, by stressing all the cores and measuring the current that is being consumed by your device. Follow the next section to check how to lower the power consumption and then run the stress-ng again to compare the results.
Lower the Power Consumption
In the next sections, there are some examples of how to lower the power consumption from the CPU. Choose the approach that better fits your project.
CPU Scaling Governor
Most of all modern processors are capable of operating in different clock frequencies and voltage configurations. There is a tradeoff between the CPU capacity (processes being executed) and the power consumed by the CPU. The higher the clock frequency and voltage, the higher the power drawn and vice-versa.
The Linux kernel offers CPU performance scaling via the CPUFreq subsystem, which defines two layers of abstraction:
- Scaling governors implement the algorithms to compute the CPU frequency.
- Scaling drivers interact with the CPU directly, changing the desired frequencies.
For more information, check the Linux kernel documentation CPU Performance Scaling.
Six scaling governors are available in the kernel:
- performance: runs at the highest clock available.
- powersave: runs at the lowest clock available.
- userspace: with this mode, all the configuration is under the user's control. Configurations will not be changed automatically, the user has to change the frequencies manually.
- schedutil: uses data from the scheduler to manage the clock in the best way possible.
- ondemand: uses the CPU load to select the right frequency. More load to the CPU will set the highest frequency possible.
- conservative: similar to "ondemand", but changes the frequency with small configurable "steps" to avoid rapid changes in power draw.
Run the following command to check which CPUs and governors are being used in your system:
# cpufreq-info
Or if cpufreq-info is not available run the following command to individually check each CPU:
# cat /sys/devices/system/cpu/cpufreq/policy0/scaling_governor
To check all the governors available for your CPU, run:
# cat /sys/devices/system/cpu/cpufreq/policy0/scaling_available_governors
Change the Scaling Governor to Power Save
There are two ways to change the governor of your module, by either running:
# echo powersave > /sys/devices/system/cpu/cpuX/cpufreq/scaling_governor
Where X is the CPU that will be modified, or by using the CPUFreq:
# cpufreq-set -c X -g powersave
Where X can be any valid CPU number.
Setting the scaling governor to powersave will keep the frequency at the lowest value possible, therefore reducing the power consumed by the module.
All these changes will only be set until the next reboot. Check the Change Governor Permanentely section to set a new governor permanently.
Change the Scaling Governor Permanently
There are two approaches that can be used to change the CPU governor permanently:
- Create a shell script that will change the scaling governor after Linux has booted with the commands described in Change the Scaling Governor to Power Save and add it to SystemD.
As an example, you can create this archive on this specific directory:
# sudo touch /etc/systemd/system/cpu-governor.service
Now, copy this configuration to the created archive /etc/systemd/system/cpu-governor.service:
[Unit]
Description=Performance CPU frequency governor

[Service]
Type=oneshot
RemainAfterExit=true
ExecStart=/bin/sh -c '\
  echo powersave > /sys/devices/system/cpu/cpu0/cpufreq/scaling_governor'
ExecStop=/bin/sh -c '\
  echo ondemand > /sys/devices/system/cpu/cpu0/cpufreq/scaling_governor'

[Install]
WantedBy=multi-user.target
To activate the service, run:
# sudo systemctl enable performance-cpu-governor.service
- Change the kernel configuration in Yocto to build a new image with the chosen scaling governor.
The second method will be described in this section and it is recommended for production.
First, create a custom kernel config file. It can be done by using the bitbake command to customize the kernel configuration.
Before doing that, remember to follow the guide Build a Reference Image with Yocto Project/OpenEmbedded to get everything working for Yocto.
Once everything is set up, run:
$ bitbake -c menuconfig virtual/kernel
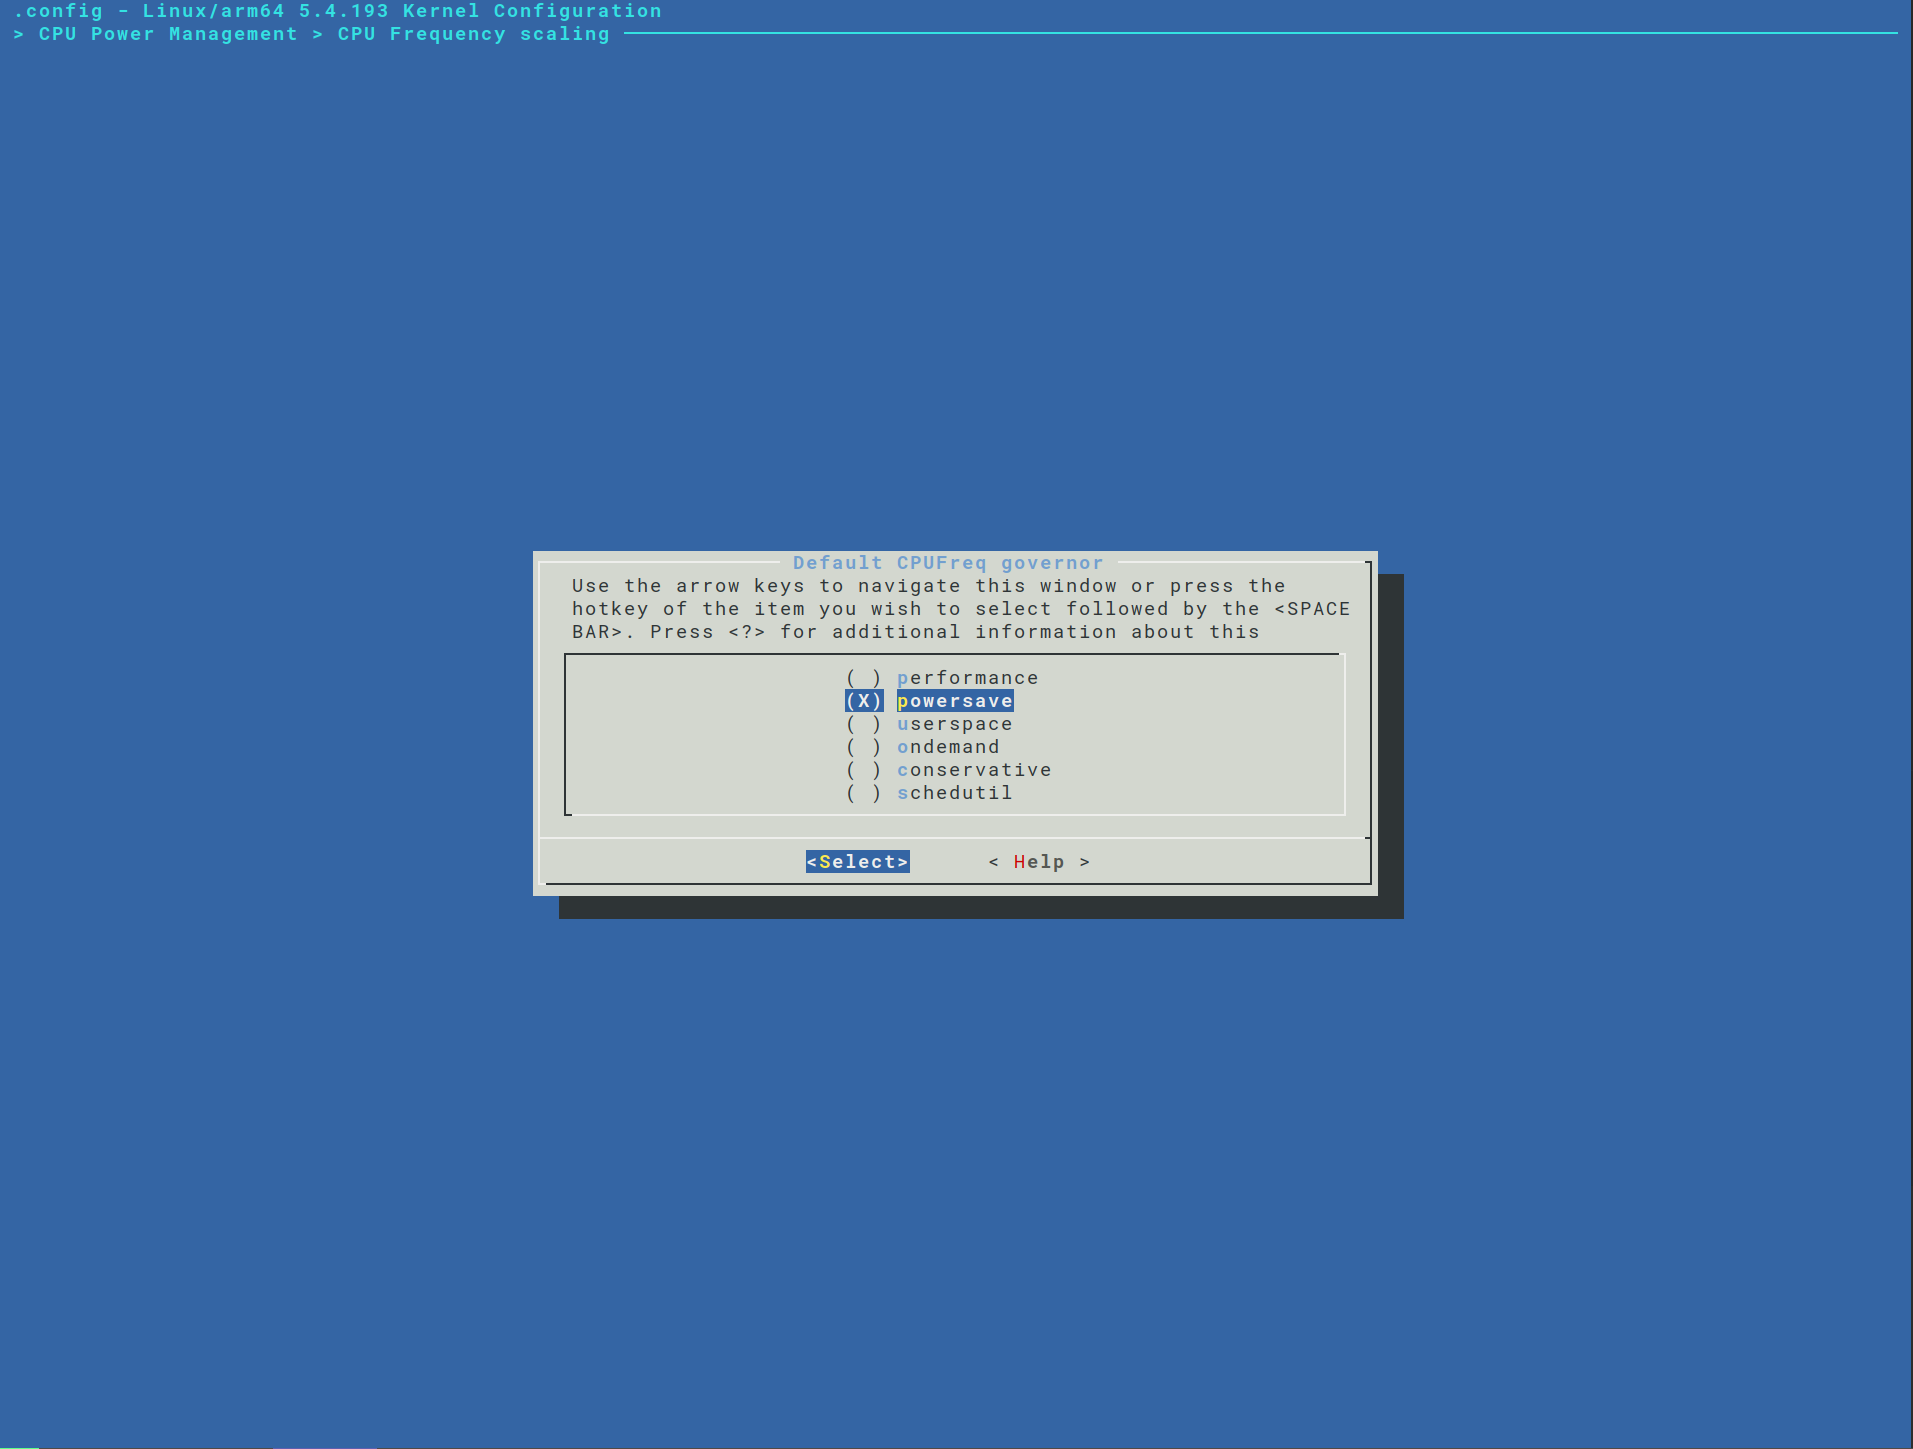
Go to CPU Power Management -> CPU Frequency Scaling -> Default CPU Governor and choose the powersave governor. Now save changes and exit.

Your custom kernel configuration will be aplied automatically when you create the image with bitbake. For more information, follow the guide Customize the Kernel.
Disable CPU Cores
Another way to lower the power consumption is by deactivating CPU cores. There is a tradeoff in this approach aswell: more cores means faster execution of tasks and more power consumption.
In order to disable a core inside linux, run the following command:
# echo 0 > /sys/devices/system/cpu/cpuX/online
Where X is the number of the CPU core. After that, a kernel message will be displayed:
[ 9020.594464] CPU0: shutdown
[ 9020.597286] psci: CPU0 killed (polled 0 ms)
Meaning that the CPU is now offline.
You can run this command for every core that is available in the module, but at least one core should be online for Linux to work.
Check the Using the CPU hotplug kernel documentation for more information.
You can enable the CPU again by running
# echo 1 > sys/devices/system/cpu/cpuX/online
However, if your application is already running, it will not make use of more cores than were available at launch.
The CPU will only be offline until the next reboot. To change it permanently, check the section Limit the Number of CPUs Permanently.
Limit the Number of CPUs Permanently
Go to the u-boot terminal by pressing the space bar multiple times after the module has powered on.
Insite u-boot terminal, run:
> setenv tdxargs "${tdxargs} maxcpus=1
To limit the CPU to one core. You can change this value to limit the number of cores.
Check The Kernel's command-line parameters for more information.
Nest, save changes, and exit.
> saveenv
> reset
Now if you run the following command inside Linux Kernel, only one CPU will be available.
# cpufreq-info
You can turn on the CPU cores again by running:
# echo 1 > /sys/devices/system/cpu/cpuX/online
Where X is the number of your CPU.
With these commands, you can limit the number of active CPU cores, therefore reducing power consumption.
Limit the CPU Usage from a Service
It is possible to limit the CPU utilization inside systemd by setting the CPUQuota variable. But to do that, first, we need to enable the CONFIG_CFS_BANDWIDTH kernel configuration.
First, open the kernel menu configuration as described in the section Change the Scaling Governor Permanently.
Before doing that, remember to follow the guide Build a Reference Image with Yocto Project/OpenEmbedded to get everything working for Yocto.
Once everything is set up, run:
$ bitbake -c menuconfig virtual/kernel
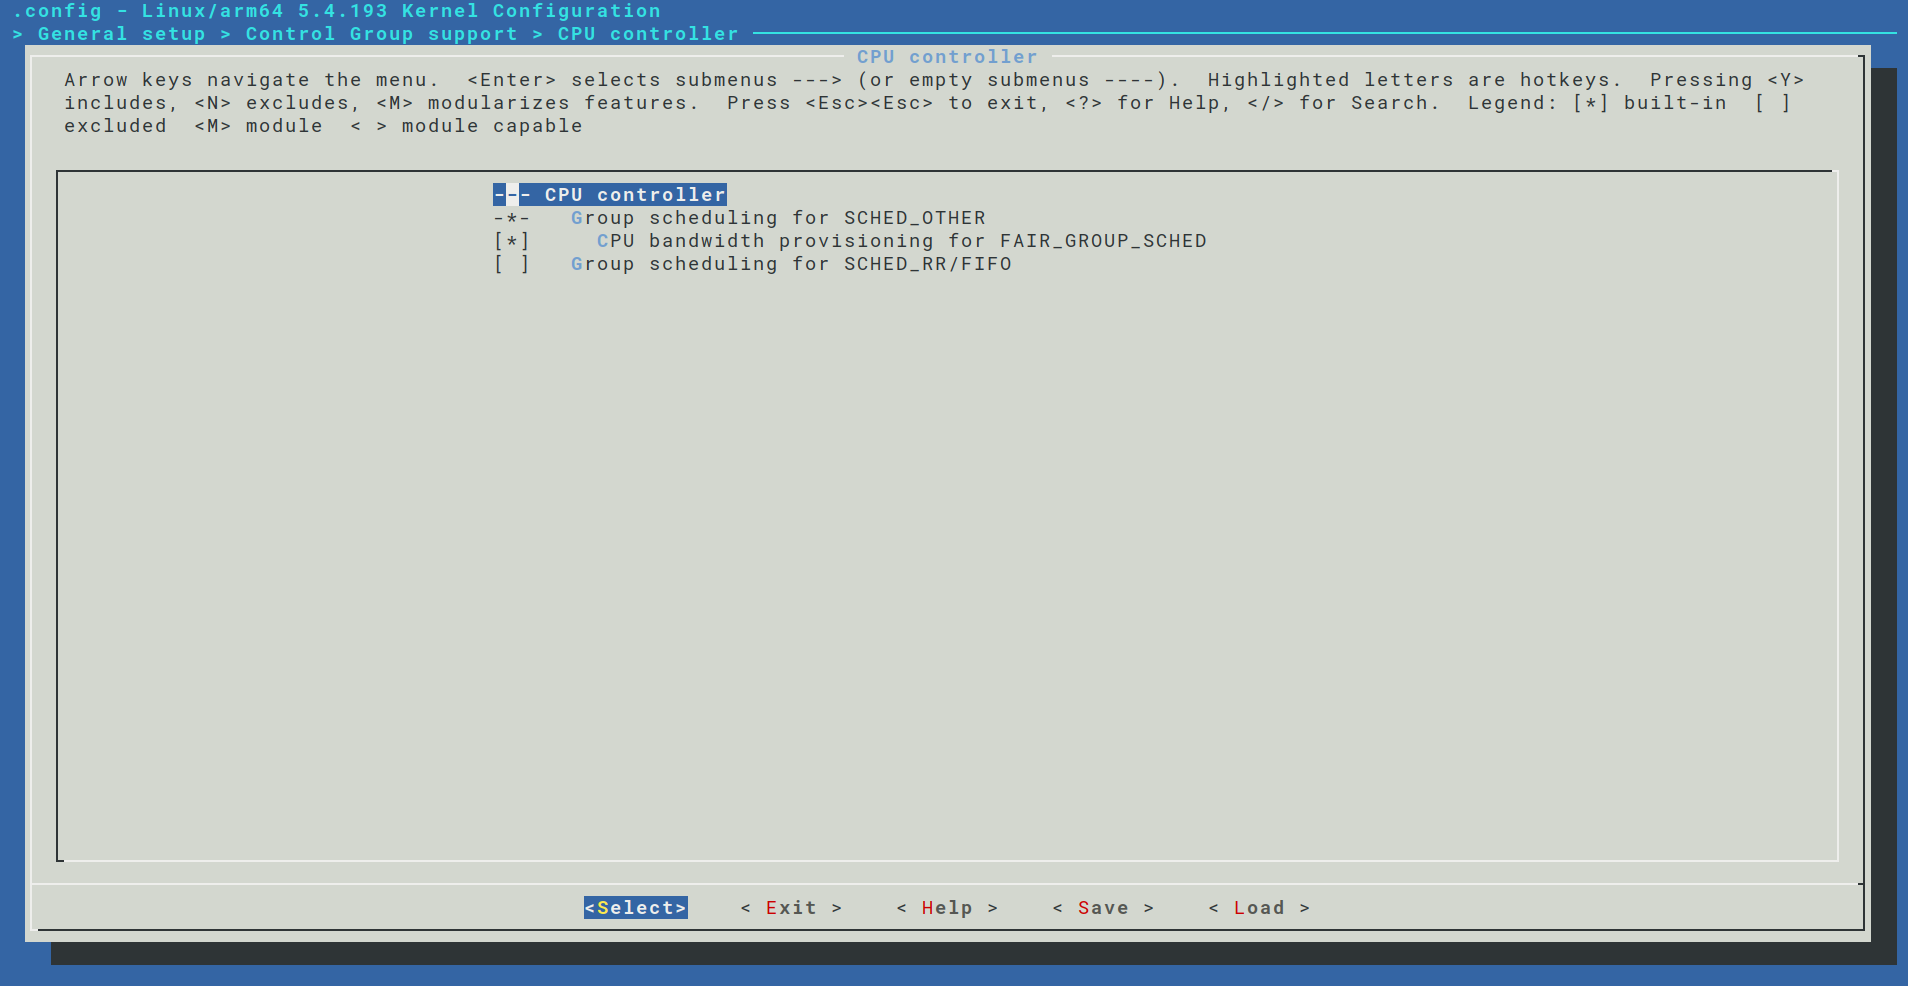
Go to General setup -> Control Group support -> CPU controller and enable the CPU bandwidth provisioning for FAIR_GROUP_SCHED option. Now save changes and exit.

Your custom kernel configuration will be aplied automatically when you create the image with bitbake. For more information, follow the guide Customize the Kernel.
Next, your service should have the CPUQuota variable inside the configuration file. Check the example with a custom service called cpu-limited.service below.
[Unit]
Description=CPU limited service

[Service]
ExecStart=/usr/bin/ddcommand
CPUQuota=10%

[Install]
WantedBy=multi-user.target
This service will run the following shell script:
#!/bin/sh
dd if=/dev/zero of=/dev/null bs=1024k
Now, with the CPUQuota=10% enabled, the max CPU usage will be 10%. Try removing it to see the CPU going to 100% (you can use the top command to check that).
Disable Frame Buffer if no display is being used
It is possible to turn off the screen if no display is attached to your hardware. Doing that, all the peripherals related to display support will be disabled.
If the frame buffer is available, it is possible to run the following command to disable it.
# echo 1 > /sys/class/graphics/fb0/blank
Check GPU Usage
If the GPU is not being used, it will be automatically shut down by the processor.
For Colibri iMX8X, this can be checked by running:
# cat /sys/kernel/debug/gc/idle
to check the idle status of the GPU.
If you are using Apalis iMX8, you can run:
# cat /sys/kernel/debug/pm_genpd/gpu0-pid0/current_state
off-0
# cat /sys/kernel/debug/pm_genpd/gpu0-pid1/current_state
off-0
To check both GPU's current states. It is possible to check the IDLE time as well, by running:
# cat /sys/kernel/debug/pm_genpd/gpu0-pid0/total_idle_time
The command will show the total time the GPU was used since your module started. With this information, you can make sure the GPU is not being used, therefore, keeping the power consumption lower.