Remote Access
Introduction
This article provides information about the Remote Access Feature of Torizon Cloud. It also guides you through the process of enabling and using the Remote Access feature.
Why Use Torizon Remote Access
Remote access to your device offers interesting advantages. It allows you to access, via SSH, the terminal of your Torizon OS target device, enabling you to test, launch, and manage your system without a physical connection, minimizing the cost with on-site visits. This feature can be important to:
- Troubleshoot: Remote access allows you to troubleshoot and debug your applications remotely.
- Maintenance: Remote access allows you to perform maintenance tasks on your device without having to physically access it.
Security With Torizon Remote Access
With Torizon Remote Access you get a unique set of security benefits:
- Extensive Metadata Validation: Torizon Remote Access performs much more validation of metadata received from the server than other clients. This means that the information received from the server is thoroughly checked for authenticity and integrity before being accepted, reducing the risk of accepting malicious data.
- Strict Authorization Process: Torizon Remote Access employs different validations methods that must all pass for a session to be authorized. It doesn't just trust a payload from the server, making sure that multiple security checks are in place before granting access to a session.
- HTTPS Certificate Pinning: Torizon Remote Access only accepts a specific pinned HTTPS certificate. By pinning the certificate, the client ensures that it only communicates with the authorized server, preventing potential man-in-the-middle attacks.
- Mutual TLS (mTLS) Authentication: Torizon Remote Access requires the device to authenticate using mutual TLS before obtaining session metadata from the server. This ensures that the client and server both verify each other's identities, adding an extra layer of security to the communication.
- Metadata Signing: The metadata received from the server is signed with an additional layer of security, using the Uptane protocols. This further ensures the integrity and authenticity of the metadata.
- User-Controlled Session Initiation: The session is only opened when the user chooses to do so, giving the user more control over when and how the remote access is initiated.
- Session Timeout and Server Control: The server can enforce session timeouts, which means that idle sessions will be automatically closed after a specified period of inactivity, reducing the risk of unauthorized access.
- Mature SSH Server Implementation: Torizon Remote Access uses a mature implementation of the SSH server running on the client-side. This implementation undergoes regular security reviews and updates to mitigate potential vulnerabilities.
- Privilege Limitation: In default settings, Torizon Remote Access runs a separate SSH server as an unprivileged user. This minimizes the potential damage that could be caused by a successful exploitation of the SSH server. A dedicated secure ssh configuration is used and not the default one present in the operating system.
For example, these are some threats Torizon Remote Access mitigates:
Compared to VPN: a common approach to the remote access problem is to include field devices in a VPN, and then SSH into the device remotely. While a simple approach, it falls prey to the VPN having a wide trusted perimeter. The devices trust any connection coming from inside the VPN (i.e. the trusted perimeter), this means that malicious actors in the network have access to the device. All of this is without mentioning that SSH runs in a daemon, with open ports susceptible to attacks. Torizon's Remote Access starts from a Zero-Trust perspective, the device trusts no one and decides for itself whether or not an incoming connection should be trusted. There are no open ports to be exploited, the device is the one to start the connection.
Compared to reverse-tunneling solutions: while these solutions also mitigate the problem of the trusted perimeter, they add another point of failure: the providers of the service themselves. For these offerings, the provider holds and manages all the security aspects of the connection, so if they are somehow breached or compromised, your field devices end up in the hands of those malicious actors. With Torizon, you can take all the keys that enable the security stack offline, managing these keys yourself. In other words, this means that even if Torizon's servers are somehow compromised, your device is still safe from that attack vector.
How to Use Remote Access
Preparation
- Use a host computer with a Linux terminal and an SSH Key generation tool.
- Get an account on https://app.torizon.io with access to the feature. Check the commercial plans for more information.
- Get a Toradex SoM with Torizon OS installed and running. This will be your target device.
- Provision the target device in Torizon Cloud. Follow the instructions under Provisioning a Device.
- Make sure the device complies with the network requirements.
1. Enable the Remote Access on the Target Device
1.1. On Torizon OS 7.2.0-devel-202503 and newer, RAC has been enabled by default. Therefore, you can skip this step.
Remote Access is pre-built in Torizon OS since version 6.3 and configured as a systemd service. To enable and start the service, run:
# sudo systemctl enable remote-access
# sudo systemctl start remote-access
1.2. Make sure your target device is connected to a network with internet access. As the connections are always outbound from the module, no special configurations are needed in the network where the module is connected. Ensure that the port 22 of the module is not blocked nor in use. For more details on network requirements for Torizon Cloud, check the Device Management section.
2. Create an SSH Key on Your Host Computer
Generate a ssh-rsa public key on the host computer from where you are going to remote access the target device. You can use ssh-keygen like the following example:
$ ssh-keygen -t rsa

Generating public/private `rsa` key pair.
Enter file in which to save the key (/home/torizon/.ssh/id_rsa):
Created directory '/home/torizon/.ssh'.
Enter passphrase (empty for no passphrase):
Enter same passphrase again:
Your identification has been saved in /home/torizon/.ssh/id_rsa
Your public key has been saved in /home/torizon/.ssh/id_rsa.pub
Check and note down the public key generated:
$ cat ~/.ssh/id_rsa.pub
3. Add the SSH Key to Torizon Cloud
3.1. Access your account on https://app.torizon.io and click on the Remote Access Manager tab.
3.2. On the SSH keys, click on Add SSH Key button.
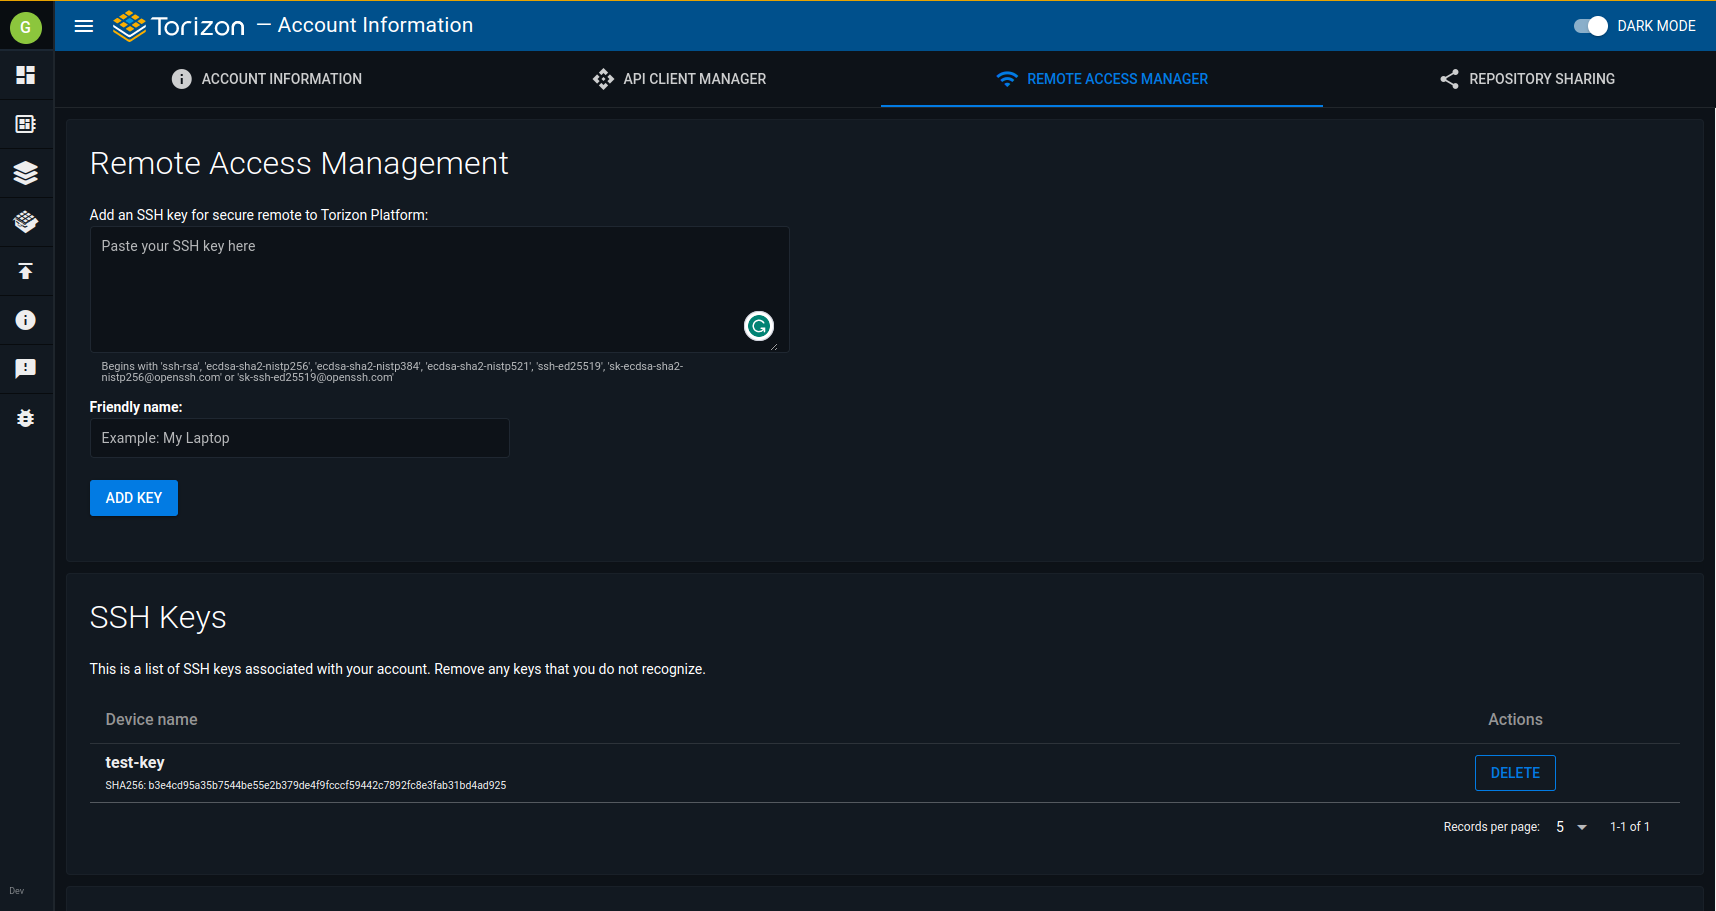
3.3. Paste the public key generated in Step 2 into Remote Access Management and click Add Key after adding a friendly name. To verify that everything went well, check the saved SSH Keys right below on the page.

4. Connecting to a Remote Device
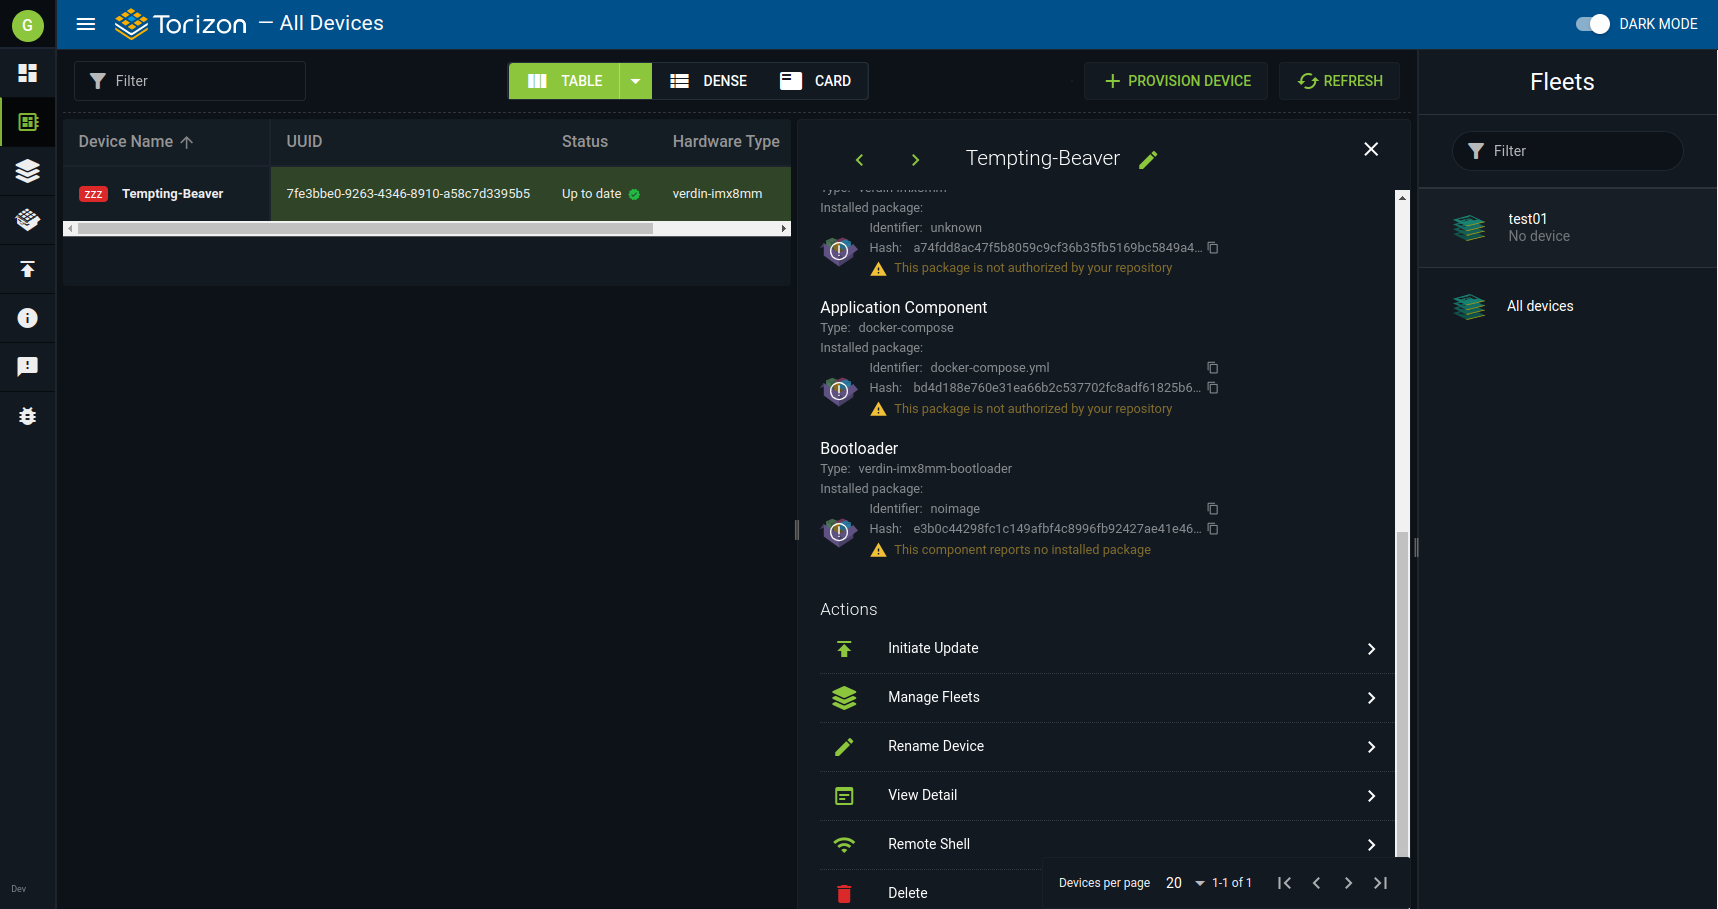
4.1. On https://app.torizon.io, go to the Devices page, click on your provisioned device, and then, on Remote Access, click on the Initiate Session to start the session.
4.2. Copy the command printed on the screen to the terminal on your host computer to remotely connect to the device. The command will be similar to the following example:
$ ssh -p <port> torizon@ras.torizon.io
Alternatively, if you have multiple keys set up on your host computer and/or your Torizon Cloud account, you can use the following command to specify which key to use:
$ ssh -v -o "IdentitiesOnly=yes" -i <your_key_filename> -p <port> torizon@ras.torizon.io
4.3. After you have finished your remote session, get back to the Remote Access Manager on the Account page and close your session at the bottom of the page, on the Active Remote Sessions.
Port Forwarding with Remote Access
The syntax to create an SSH tunnel is close to the typical SSH command. The -L flag indicates that traffic to the <local_port> in your computer should be redirected through the tunnel to the <remote_port> in the module. For information on the basic SSH command, see Connecting to a Remote Device.
$ ssh -L <local_port>:<localhost>:<remote_port> -p <port> torizon@ras.torizon.io
The tunnel lasts while the SSH connection is active.
VNC
To use VNC in a remote session, run the following command, which creates a tunnel between the VNC port on your computer and the VNC port on the module:
$ ssh -L 5900:127.0.0.1:5900 -p <port> torizon@ras.torizon.io
Then, you can access the device with VNC as if it were on your local network.
For information about using VNC or RDP on Torizon OS, see Use VNC and RDP.
Troubleshooting
The Remote Access feature has built-in rate limits for security reasons. It prevents random connection from scanning through available ports. If an IP address hits the limit, it will be banned for 24 hours. As of today the tested limit cases are:
- Connecting more than 100 times in one minute
- Connecting to more than 100 different ports in one hour
When the IP is banned and you try to connect, the connection will drop. Keep in mind that there’s no special message that lets the user know their IP is banned, but typically, you would see kex_exchange_identification: read: Connection reset as an error message from the SSH client, depending on the client being used.