When connecting the AGT displays to Toradex boards, make sure that pin 1 of the display is connected to pin 1 of the board.
Due to the nature of the FFC connectors, it is possible to invert the pinout and possibly damage the display and/or carrier board.
Be also careful with the brown levers on the connectors. They are very delicate and can easily break.
Toradex Carrier Boards have two types of connectors, connectors that have electric pins in two sides(e.g: Iris Carrier Board, Aster Carrier Board and Viola Carrier Board) and connectors that have electric pins in only one side(e.g: Colibri Evaluation Carrier Board, Ixora Carrier Board and Apalis Evaluation Carrier Board), check below how to connect the flat cable correctly to your board.
Note: For the Touch Display 10", you must power on the back light using a 9V power supply.
Please have a look at the pictures below which show how to connect the cable:

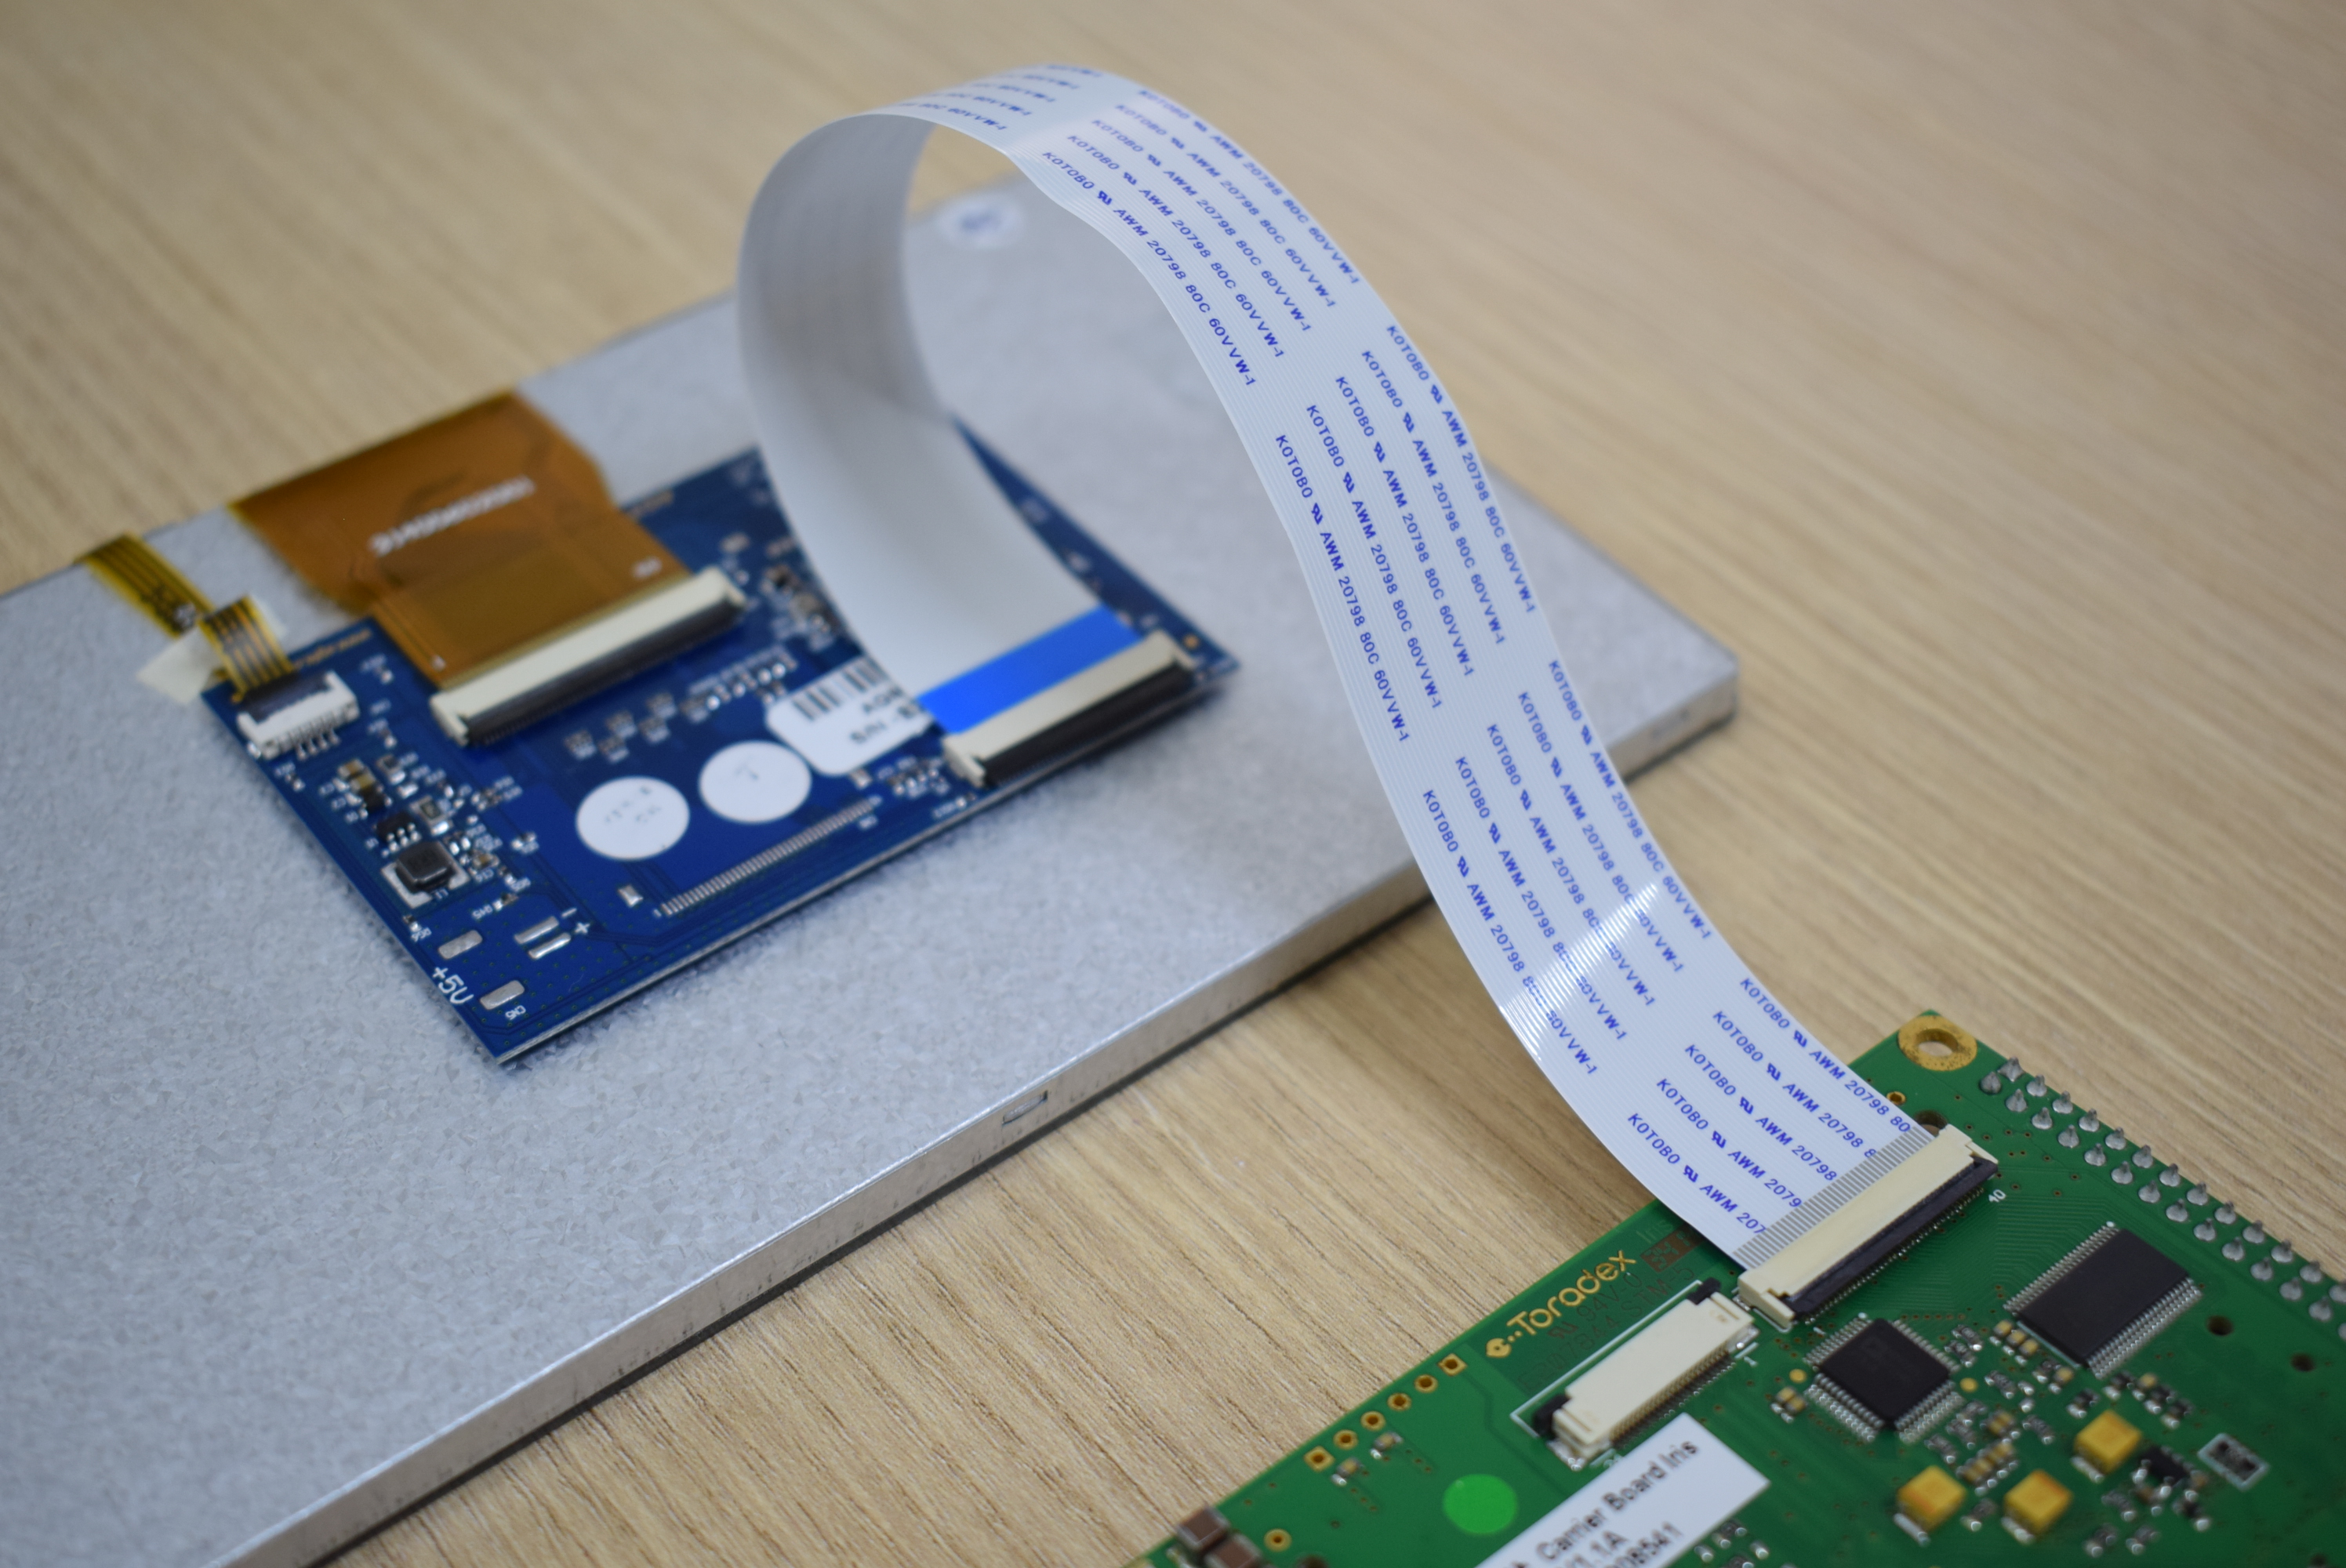
Above we can see the two possible ways to connect the flat cable, in the two ways we keep the pin 1 of display connected to the pin 1 of the board.
Please have a look at the picture below which shows how to connect the cables:
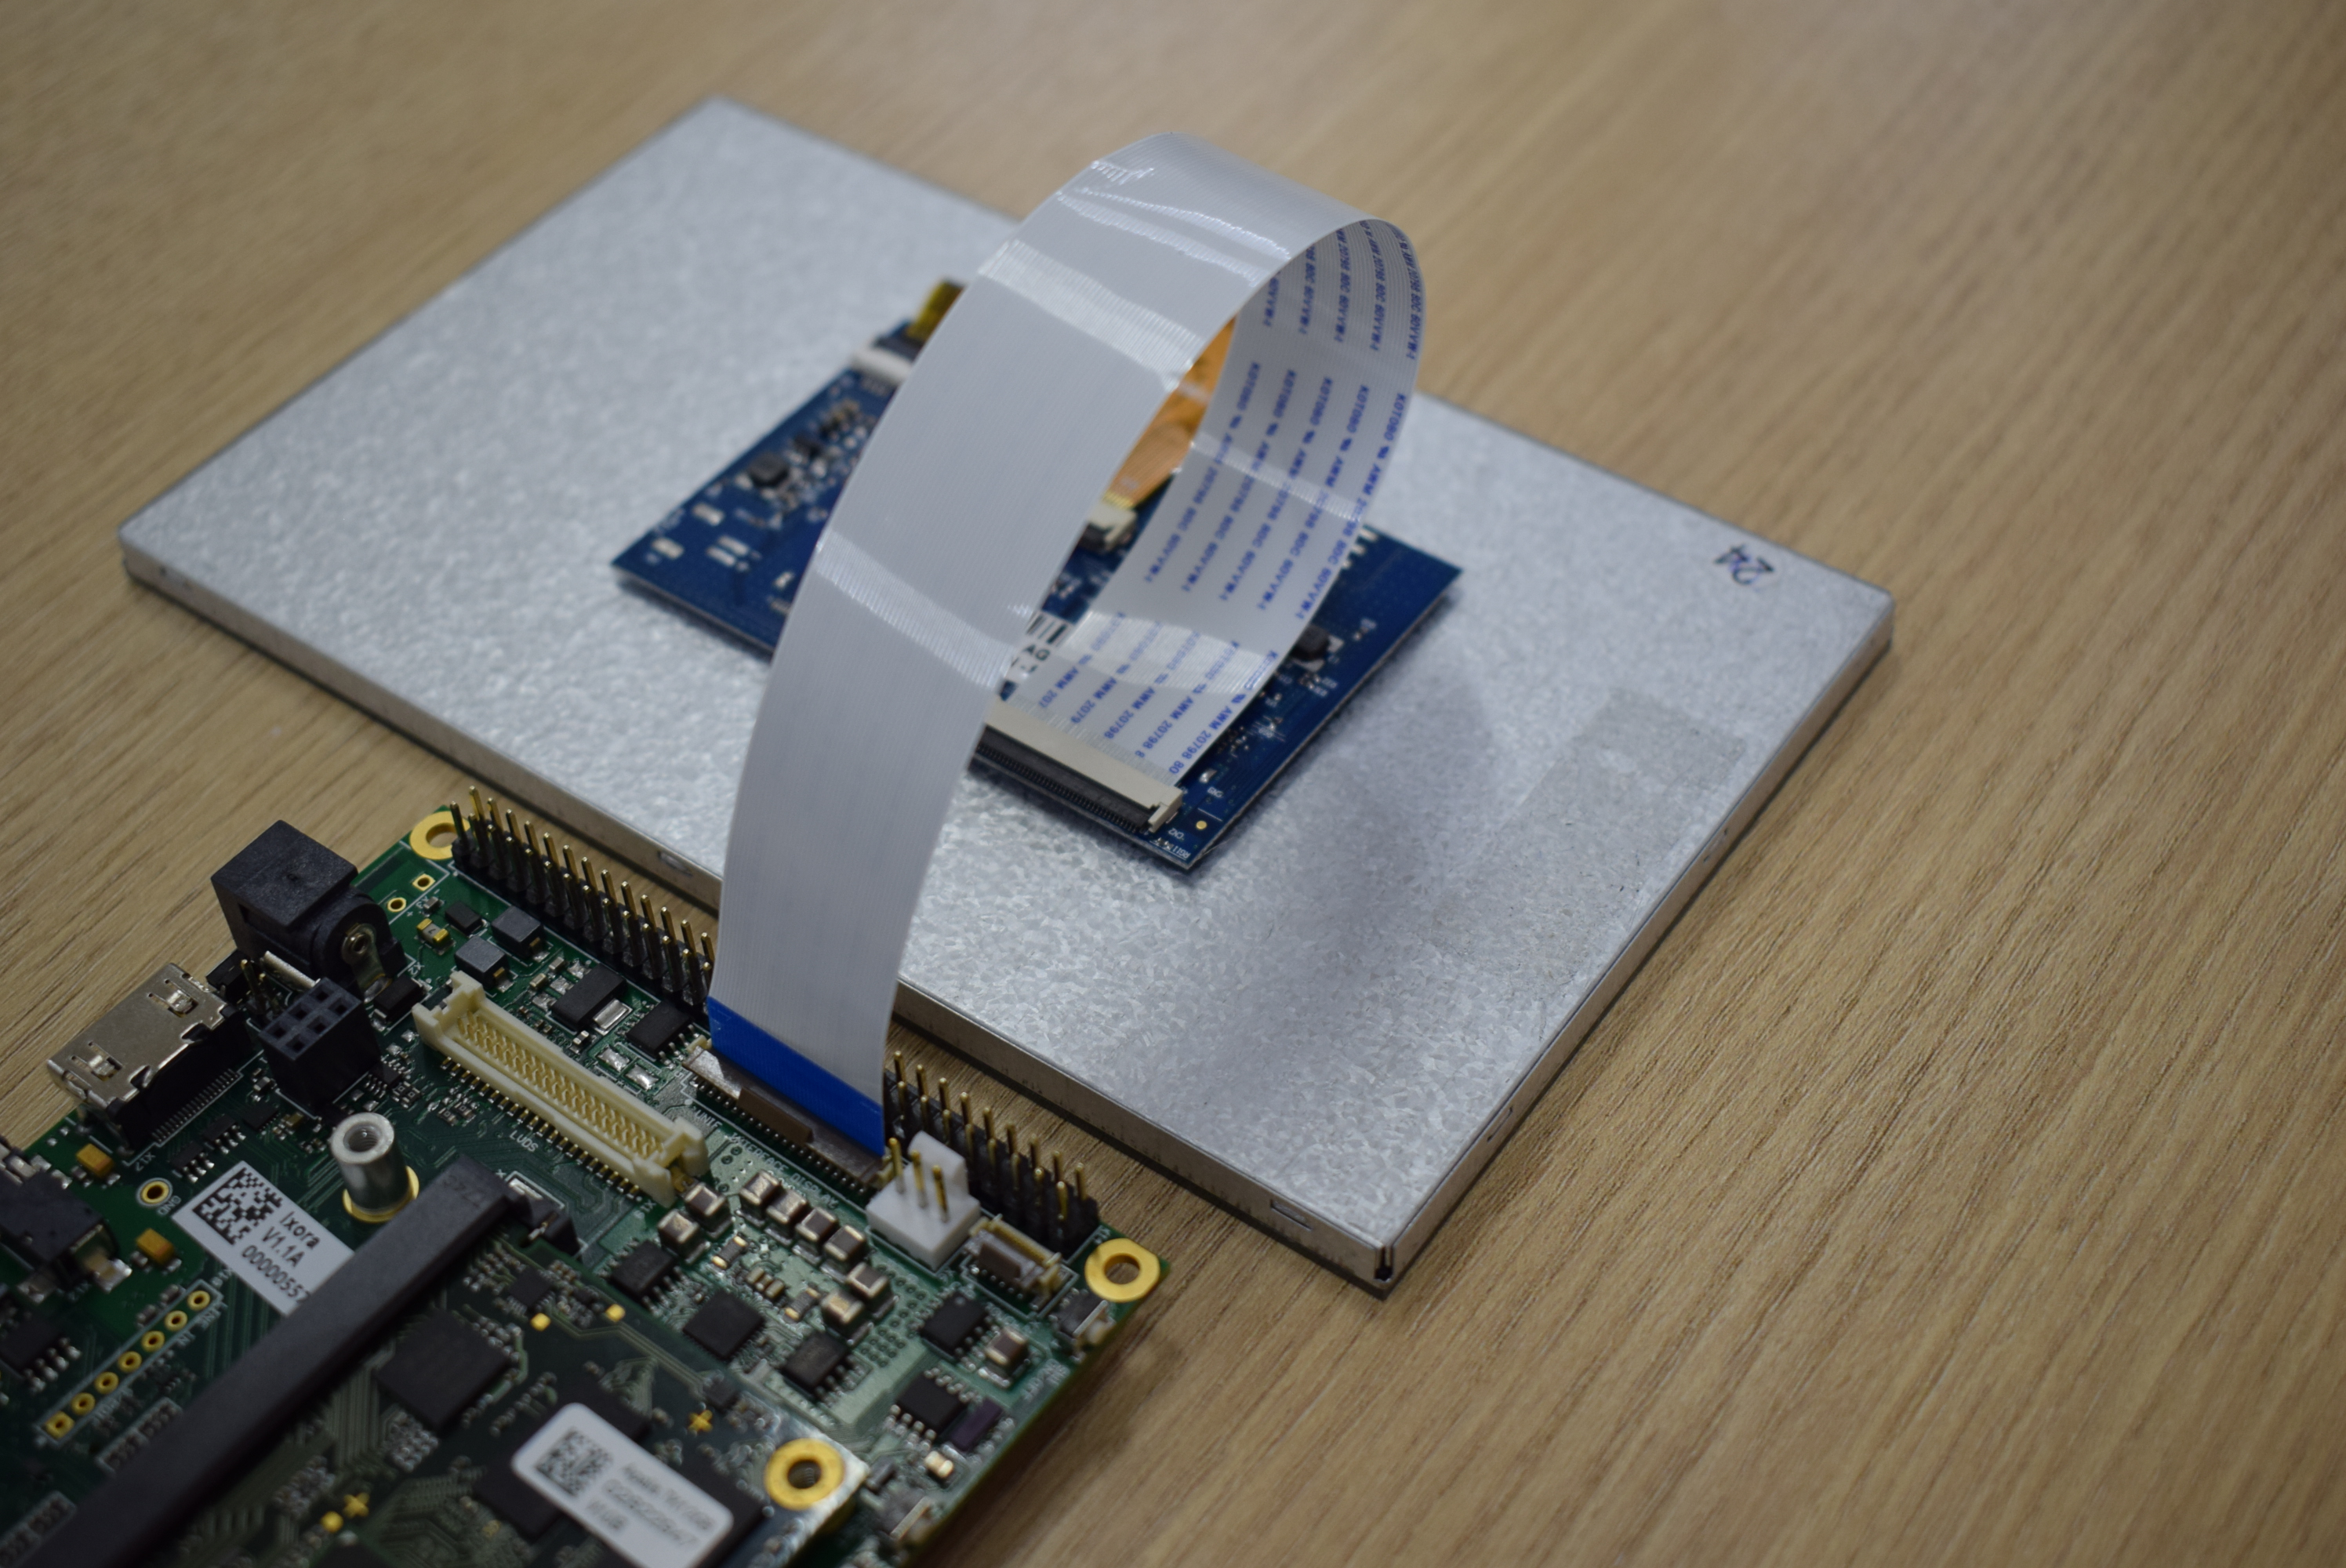
Above we can see the unique way to connect the flat cable, we just have one way because the board has electric pins in only one side.
Please follow the instructions in the AGT Touch Diplays 4", 7" and 10" (Linux) article.
