How to setup environment for Embedded Linux application development
This article will help the intended reader in setting up an environment for Embedded Linux application development. The resulting environment enables cross-platform application development for Toradex ARM-based SOMs/COMs using a typical Linux desktop workstation for application development.
Requirements
Hardware Requirements
- Development workstation running Linux (Ubuntu 16.04), referred to as host
Note that the host may run in a virtual machine but recommendation would be to use standalone Linux desktop. - Apalis or Colibri module (excluding PXA-based modules) referred to as target
- Suitable carrier board (e.g. Colibri Evaluation board, Iris, Aster for Colibri and Apalis Evalaution board, Ixora for Apalis)
- USB device cable (Standard Type A to Type B, Type A to Micro-B or Type A to Mini-B depending on your carrier board)
- Suitable DVI or VGA cable
Restrictions:
- Apalis T30: DVI-D only
- Colibri VFXX: VGA/DVI-A only - Suitable DC power supply (e.g. 12V, 5A)
- Suitable console cable (e.g. RS232 null modem, standard USB Type A to Type B or RS232 to USB converter plus optional adapter cable depending on your carrier board)
- Ethernet cable
- Optional 2nd host Ethernet interface (e.g. USB to Ethernet adaptor)
- Optional Ethernet switch
- Optional Internet connection
Software Requirements
- Embedded Linux image Pre-built Linux images with U-Boot / kernel / rootfs can be found [here].
Please refer to the release notes document for information concerning a specific image. The release notes can be found at the Linux BSP Release.
Development Setup
The following block diagram illustrates the hardware setup suitable for development.

Host Linux Configuration
Configuration Alternatives
There are a few ways to have a development workstation setup. Some (but not all) examples are given below:
Cross Compilation Toolchain:
- Linaro cross toolchain.
- OpenEmbedded generated cross toolchain.
- OpenEmbedded SDK.
Target Root File System:
- Linaro sample root file system.
- Toradex Embedded Linux pre-built image root file system.
- OpenEmbedded SDK.
IDE:
- Eclipse IDE provided in the distribution feeds.
- Eclipse IDE downloaded directly from their website or using the Eclipse Installer.
- Qt Creator IDE.
In the present article, the following is used: Linaro or OpenEmbedded generated cross toolchain, Toradex Embedded Linux pre-built image root file system and Eclipse IDE provided in the distribution feeds. In the subsequent article Hello World application on Embedded Linux, it is presented how to configure Eclipse using the Linaro toolchain.
For beginners, the step-by-step Getting Started Guide uses pre-built OpenEmbedded SDK and Eclipse IDE from the Eclipse Installer. It explains comprehensively how to configure Eclipse to use the toolchain and root file system provided by the SDK.
When you start using Yocto/OpenEmbedded, the Linux SDKs article uses custom SDK built with OpenEmbedded and Eclipse IDE (assumed it is already installed). It explains objectively how to configure Eclipse to use the toolchain and root file system provided by the SDK.
Linux Distribution for the Development Workstation
One can choose any Linux distribution (like Fedora, SUSE, Debian) for development. A 64-bit install is preferred as you might want to use the machine also for OpenEmbedded work. Cross-compiling certain packages requires the larger address space available. Also, the latest cross toolchains from Linaro are provided only for 64-bit hosts. Should you choose Ubuntu, use the bash shell instead of dash. (Google for 'ubuntu bash update-alternatives')
In this article, we will be using Ubuntu 14.04. Visit the Ubuntu website to explore how to install Ubuntu on your development workstation.
Update and Upgrade Necessary Packages for Ubuntu
To start a terminal on the host:
In Gnome Desktop Environment:
Applications menu -> Accessories -> Terminal
In Unity Desktop Environment:
In the launcher click the 'Dash home' icon
Dash -> enter 'Terminal' in the search box
Dash -> click 'Terminal' in found results, a new Terminal window opens, a Terminal icon appears in the Launcher
Right click the new Terminal icon, click 'Lock to Launcher' to have it permanently attached to the Launcher
At the host terminal:
E.g. for Ubuntu 14.04:
sudo apt-get update
sudo apt-get upgrade
sudo apt-get install build-essential meld git gawk eclipse-cdt eclipse-cdt-launch-remote eclipse-rse minicom
sudo apt-get install gtk+-2.0-dev
#if you have a 64-bit Linux host install your distributions 32-bit compatibility libraries.
sudo dpkg --add-architecture i386
sudo apt-get update
sudo apt-get install libz1:i386 libncurses5:i386 libbz2-1.0:i386 libstdc++6:i386
Embedded Linux Root File System
The latest Linux images are available at:
Download the latest image for your module and extract the archive on the host machine with root privileges. For example:
sudo mkdir -p /srv/nfs
cd /srv/nfs
sudo wget https://files.toradex.cn/Colibri/Linux/Images/Colibri_T20_LinuxImageV2.4Beta1_20150518.tar.bz2
sudo tar xjvf Colibri_T20_LinuxImageV2.4Beta1_20150518.tar.bz2
The rootfs will be used on the host machine to compile and link against. The extracted files will also be used later to flash the full image onto the target.
Create a symbolic link to have the target root file system at a stable location. For example:
cd /srv/nfs
sudo ln -s Colibri_T20_LinuxImageV2.3/rootfs rootfs
cd
Note: In this example, the link is placed to an NFS server path. Any path may be used for software development; however, by hosting the rootfs on an NFS server it is possible for the target device to mount the rootfs via the network allowing simultaneous access to the live rootfs by both target & host.
Cross Toolchain
Install the cross tool chain
A cross-toolchain (often times just called cross-compiler) is used to build an application on the host which later on can be executed on the target device.
Use version 9.2 or higher of the Arm releases binary toolchains to cross-compile software for Toradex modules:
- For 32 bit Arm: arm-gnu-toolchain-12.3.rel1-x86_64-arm-none-linux-gnueabihf.tar.xz
- For 64 bit Arm: arm-gnu-toolchain-12.3.rel1-x86_64-aarch64-none-linux-gnu.tar.xz
You have to choose to download either the 32 bit or 64 bit Arm cross-toolchain, according to the architecture of your System on Module SoC. Select the correct one from the tabs below:
To install the toolchain on your host machine, download and unpack the tar.xz file. From the command-line:
$ cd ~
$ wget -O arm-gnu-toolchain-12.3.rel1-x86_64-arm-none-linux-gnueabihf.tar.xz "https://developer.arm.com/-/media/Files/downloads/gnu/12.3.rel1/binrel/arm-gnu-toolchain-12.3.rel1-x86_64-arm-none-linux-gnueabihf.tar.xz?rev=9d73bfdd64a34550b9ec38a5ead7c01a&hash=774AAE1A6D6996CFB89FD7E367C0B59B"
$ tar xvf arm-gnu-toolchain-12.3.rel1-x86_64-arm-none-linux-gnueabihf.tar.xz
$ ln -s arm-gnu-toolchain-12.3.rel1-x86_64-arm-none-linux-gnueabihf gcc-linaro
Or you can download the toolchain from Arm website.
The U-Boot and Linux makefiles use the environment variables ARCH/CROSS_COMPILE to configure and call the compiler correctly. Therefore, these environment variables must be exported in any shell instance that will run configure/compile commands to build U-Boot or Linux for the target module.
$ export ARCH=arm
$ export DTC_FLAGS="-@"
$ export PATH=~/gcc-linaro/bin/:$PATH
$ export CROSS_COMPILE=arm-none-linux-gnueabihf-
You can put those commands into a file and source that file to export it more easily, e.g.:
$ echo "export ARCH=arm" >> ~/export_compiler
$ echo "export DTC_FLAGS='-@'" >> ~/export_compiler
$ echo "export PATH=~/gcc-linaro/bin/:$PATH" >> ~/export_compiler
$ echo "export CROSS_COMPILE=arm-none-linux-gnueabihf-" >> ~/export_compiler
$ source ~/export_compiler
To install the toolchain on your host machine, download and unpack the tar.xz file. From the command-line:
$ cd ~
$ wget -O arm-gnu-toolchain-12.3.rel1-x86_64-aarch64-none-linux-gnu.tar.xz "https://developer.arm.com/-/media/Files/downloads/gnu/12.3.rel1/binrel/arm-gnu-toolchain-12.3.rel1-x86_64-aarch64-none-linux-gnu.tar.xz?rev=cf8baa0ef2e54e9286f0409cdda4f66c&hash=4E1BA6BFC2C09EA04DBD36C393C9DD3A"
$ tar xvf arm-gnu-toolchain-12.3.rel1-x86_64-aarch64-none-linux-gnu.tar.xz
$ ln -s arm-gnu-toolchain-12.3.rel1-x86_64-aarch64-none-linux-gnu gcc-linaro
Or you can download the toolchain from Arm website.
The U-Boot and Linux makefiles use the environment variables ARCH/CROSS_COMPILE to configure and call the compiler correctly. Therefore, these environment variables must be exported in any shell instance that will run configure/compile commands to build U-Boot or Linux for the target module.
$ export ARCH=arm64
$ export DTC_FLAGS="-@"
$ export PATH=~/gcc-linaro/bin/:$PATH
$ export CROSS_COMPILE=aarch64-none-linux-gnu-
You can put those commands into a file and source that file to export it more easily, E.g.:
$ echo "export ARCH=arm64" >> ~/export_compiler
$ echo "export DTC_FLAGS='-@'" >> ~/export_compiler
$ echo "export PATH=~/gcc-linaro/bin/:$PATH" >> ~/export_compiler
$ echo "export CROSS_COMPILE=aarch64-none-linux-gnu-" >> ~/export_compiler
$ source ~/export_compiler
Eclipse IDE
on the BSP version 4.0 of BSP Layers and Reference Images for Yocto Project, Toradex started to use dropbear for SSH service and disable-weak-ciphers is enabled by default. When trying to use the Eclipse SSH connection - remote system explorer and SSH connection in debug feature - it fails because it seems that Eclipse still uses some weak ciphers (tested with 4.16 and 4.12). Add the line PACKAGECONFIG_remove_pn-dropbear = " disable-weak-ciphers" to local.conf and rebuild the Yocto image.
Prepare the Eclipse IDE
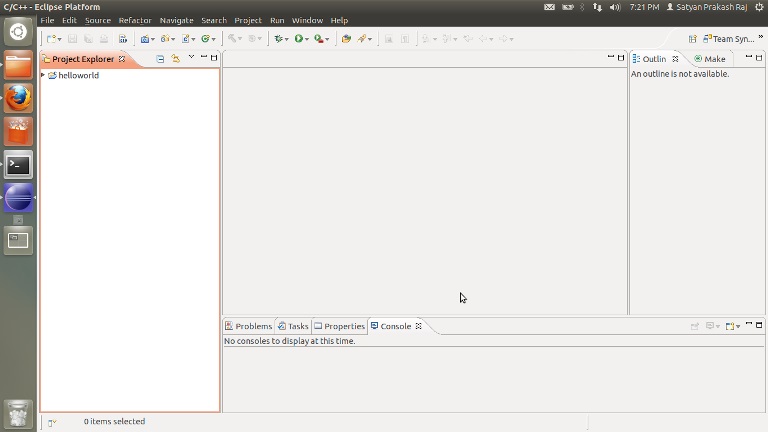
At the host terminal:
eclipse
Accept the default workspace location. Once on the welcome screen click "Workbench". You might want to have Eclipse on the launcher. Right click the Eclipse icon in the launcher and click 'Lock to Launcher'.
Serial Console
Prepare Minicom
Minicom is a virtual terminal application. We will use it to see console output from the target during boot and may use it to login and work with the Linux command line on the target.
Put yourself into the dialout group (or whatever is needed to have access rights to serial devices in your distribution). Configure minicom for the serial port you will be using on your host, 115200 8N1 no hardware flow control. Set init, reset and hang-up modem control strings to empty and set modem has DCD line to no.
Save your minicom configuration as default. (Save setup as dfl)
sudo adduser YOUR_USER dialout
sudo minicom -s

 +-----[configuration]------+
 | Filenames and paths      |
 | File transfer protocols  |
 | Serial port setup        |
 | Modem and dialing        |
 | Screen and keyboard      |
 | Save setup as dfl        |
 | Save setup as..          |
 | Exit                     |
 | Exit from Minicom        |
 +--------------------------+

 +-----------------------------------------------------------------------+
 | A -    Serial Device      : /dev/ttyUSB0                              |
 | B - Lockfile Location     : /var/lock                                 |
 | C -   Callin Program      :                                           |
 | D -  Callout Program      :                                           |
 | E -    Bps/Par/Bits       : 115200 8N1                                |
 | F - Hardware Flow Control : No                                        |
 | G - Software Flow Control : No                                        |
 |                                                                       |
 |    Change which setting?                                              |
 +-----------------------------------------------------------------------+

 +--------------------[Modem and dialing parameter setup]---------------------+
 |                                                                            |
 | A - Init string .........                                                  |
 | B - Reset string ........                                                  |
 | C - Dialing prefix #1.... ATDT                                             |
 | D - Dialing suffix #1.... ^M                                               |
 | E - Dialing prefix #2.... ATDP                                             |
 | F - Dialing suffix #2.... ^M                                               |
 | G - Dialing prefix #3.... ATX1DT                                           |
 | H - Dialing suffix #3.... ;X4D^M                                           |
 | I - Connect string ...... CONNECT                                          |
 | J - No connect strings .. NO CARRIER            BUSY                       |
 |                           NO DIALTONE           VOICE                      |
 | K - Hang-up string ......                                                  |
 | L - Dial cancel string .. ^M                                               |
 |                                                                            |
 | M - Dial time ........... 45      Q - Auto bps detect ..... No             |
 | N - Delay before redial . 2       R - Modem has DCD line .. No             |
 | O - Number of tries ..... 10      S - Status line shows ... DTE speed      |
 | P - DTR drop time (0=no). 1       T - Multi-line untag .... No             |
 |                                                                            |
 | Change which setting?       (Return or Esc to exit)                        |
 +----------------------------------------------------------------------------+
Device Operation
this section is outdated. Starting with BSP 3.0 Toradex dropped the Ångström distribution on its BSP Layers and Reference Images for Yocto Project and moved to a Poky-based image. It means that no desktop environment and no SDK are provided, and you will most likely need to do a custom Yocto build. If you look for ease-of-use, Toradex recommends Torizon.
Boot Up
- Start minicom
- Power on the target.
- Notice the boot messages in minicom when the target boots.
- The first boot might take a while.

Linux Image Update
You should already have downloaded and extracted the appropriate Linux image to your host machine. If you skipped this step, then do it now.
Our latest Embedded Linux BSP demo images & release notes are provided at:
Refer to the Following Articles for Detailed Flashing Instructions:
- Flashing Embedded Linux to iMX6 Modules
- Flashing Embedded Linux to Tegra Modules
- Flashing Embedded Linux to Vybrid Modules
Note: We have developed Toradex Easy Installer for updating OS on Toradex Module. Please check below article for more detail.
When the update is complete the target should be booting the latest Linux OS.
Network Connectivity
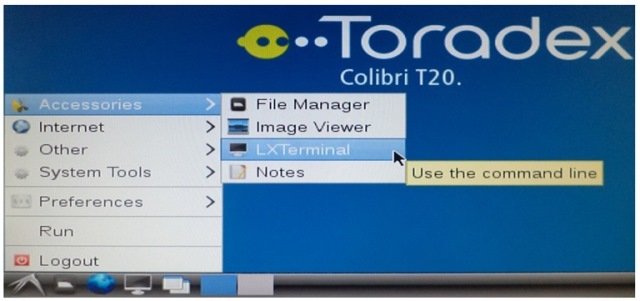
- Start terminal application LXTerminal on the target device.
- Check the IP address of the Ethernet network. The IP address of the target's Ethernet interface will be required to remotely access the target device from the host.
Note that Ethernet is configured to do DHCP by default.
At the target device's terminal:
ip addr
- (OPTIONAL) To manually assign an IP address to the target's Ethernet interface.
At the target device's terminal:
connman-properties
In the opening dialog:
- Click Ethernet
- Change Configuration to 'MANUAL'
- Enter IP address, Netmask and Gateway
- Click Apply
- Click Close

For a more complex network setup, refer to How to setup Networking for Embedded Linux Application Development.
Write a "Hello World" Application
You're now ready to write your first application! Continue with the Hello World application on Embedded Linux.